Integrate Vend Integration to BigCommerce BOPIS by RANDEMRETAIL
How to Integrate Vend into BigCommerce BOPIS by RANDEMRETAIL
As part of our BOPIS Application you are able to integrate your Vend into the BigCommerce BOPIS App.
This will integrate your current Vend instance into the Bigcommerce BOPIS to pull through live inventory counts to the correct stores as you create them in BOPIS.
This guide assumes you already have the Vend to BigCommerce connector installed, this is what syncs your orders from BigCommerce into Vend. You can find that application here: https://www.bigcommerce.com/apps/vend/
STEP 1: Retrieve information from Vend
The first stage is to get the information from Vend which is needed to connect.
First you need to log into your Vend store. Here you will need to navigate to Setup and then Personal Tokens. We need to generate a new Personal Token to create the Connection between BigCommerce BOPIS and Vend.
After you have navigated into Personal Tokens you will need to create a new one. Click Create Personal Token, name this something related to BOPIS. Ensure that you don't tick "Allow Personal Tokens to Expire". You will then be presented with an API Key. Save this for later.
The final piece you need is the URL of the store, it should be in a format similar to example.vendhq.com. Ensure that you record it in the format of https://cctest123.vendhq.com/.

Vend Step 1

Vend Step 2

Vend Step 3
STEP 2: Apply API Information into BigCommerce BOPIS App by RANDEMRETAIL
Navigate back to BigCommerce BOPIS by RANDEMRETAIL within your BigCommerce Store. In the main Menu scroll down to Integrations then choose Vend.
Here you will need to enter the API information that you saved in the last step. There are 2 fields to enter here:
-
In API Key put the Personal Token that you Generated from Vend
-
In the API URL field put the URL of your store. e.g. https://cctest123.vendhq.com/.
After you have entered that information click Save. This will create the connection between the BOPIS app and your Vend system.

Part 1

Part
STEP 3: Map Stores
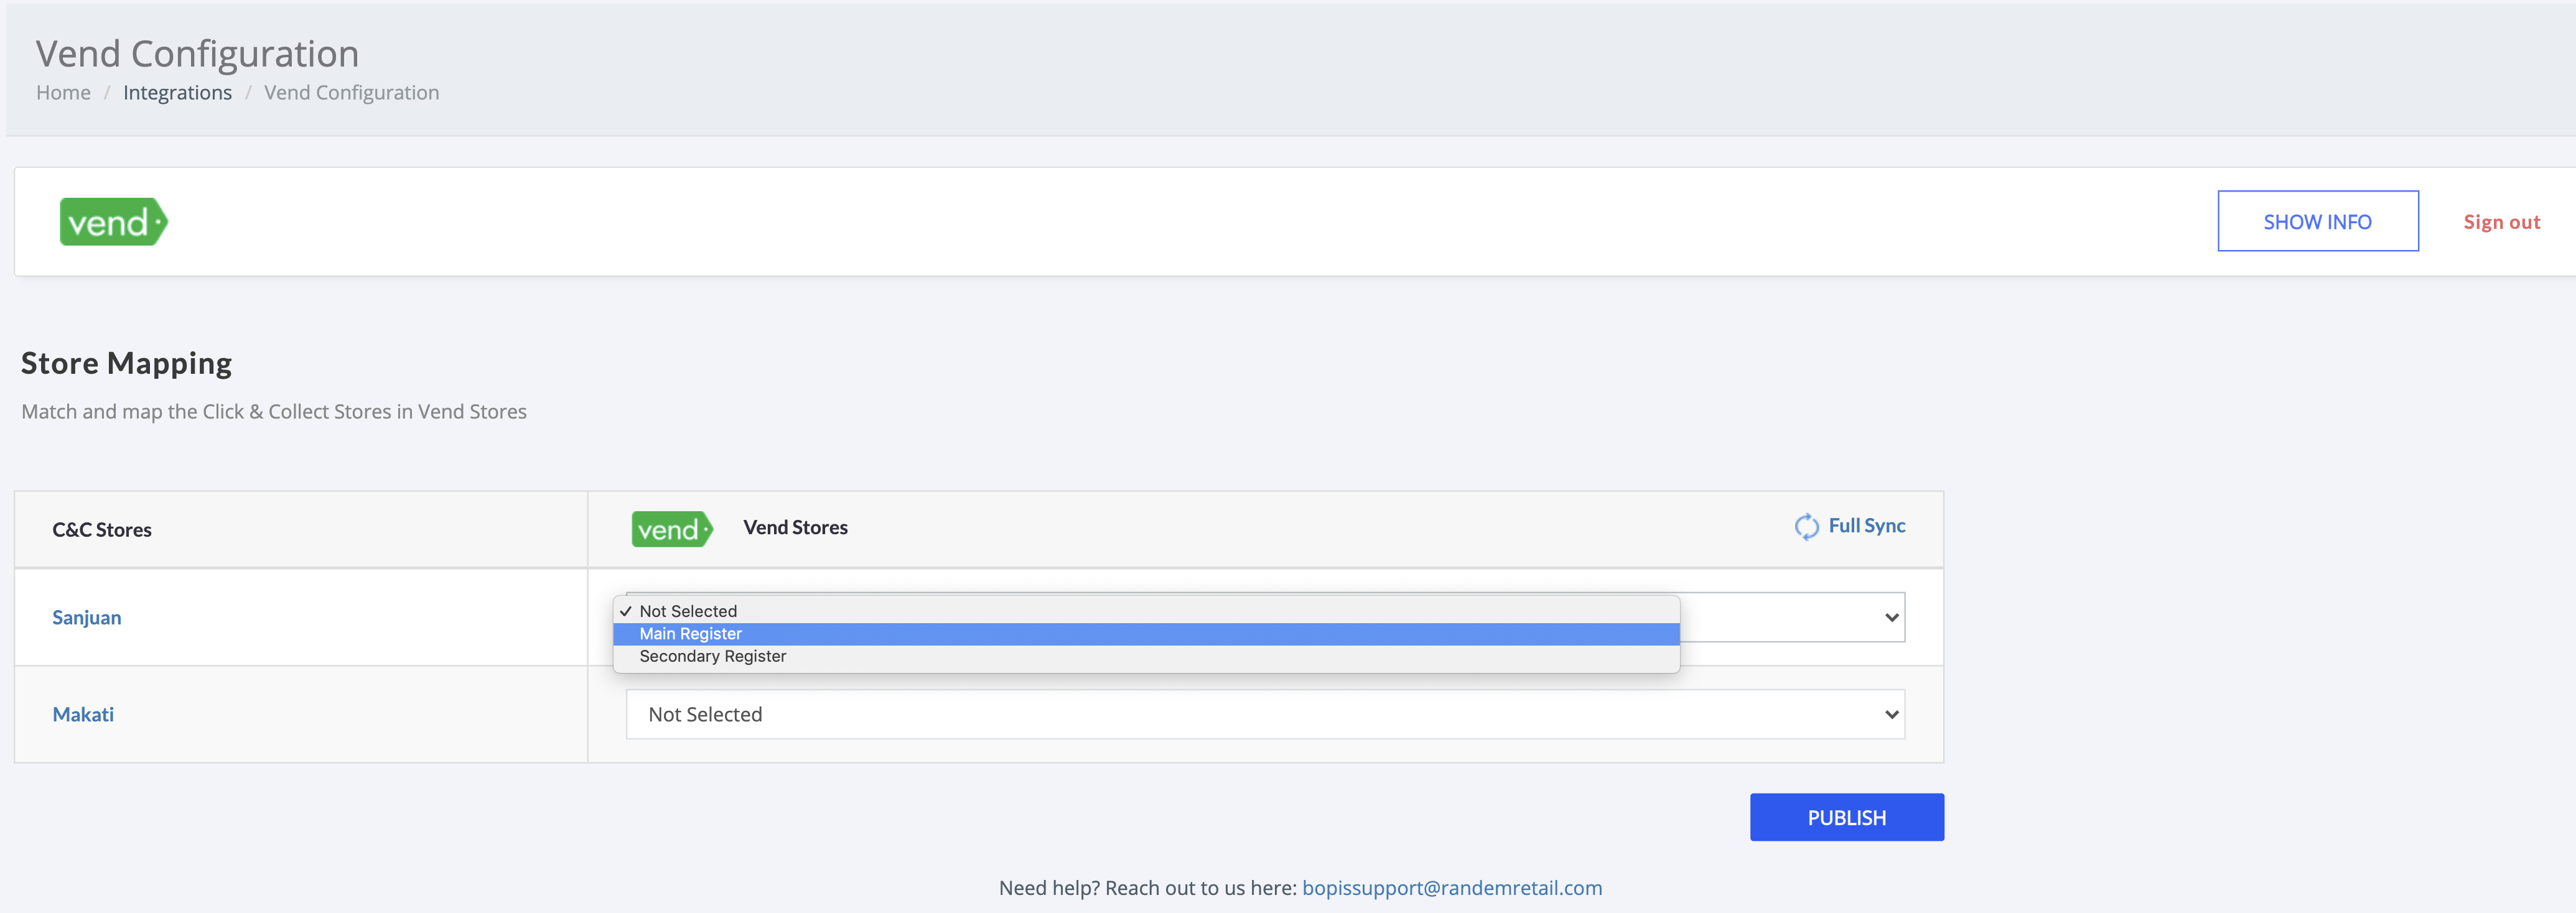
After connecting BOPIS and Vend you will need to map the Vend locations to the BOPIS locations. Note, the Vend locations that the app picks up are Registers. You will be mapping based on the names of registers in each location.
When you finish step 2 you will be able to begin mapping stores. On the same page as the previous step you will see a table. This table lists in the first column all the store that have been created in the BOPIS app and in the second column there is an empty dropdown associated with each store. If you click one of these dropdowns you will see each of your Vend Registers. For each store in BOPIS select the Register from Vend that is associated with that store. Once you have finished those mappings click Save. This will make the connections between the Vend locations and the BOPIS stores to ensure inventory syncs correctly.

STEP 4: Force a full sync
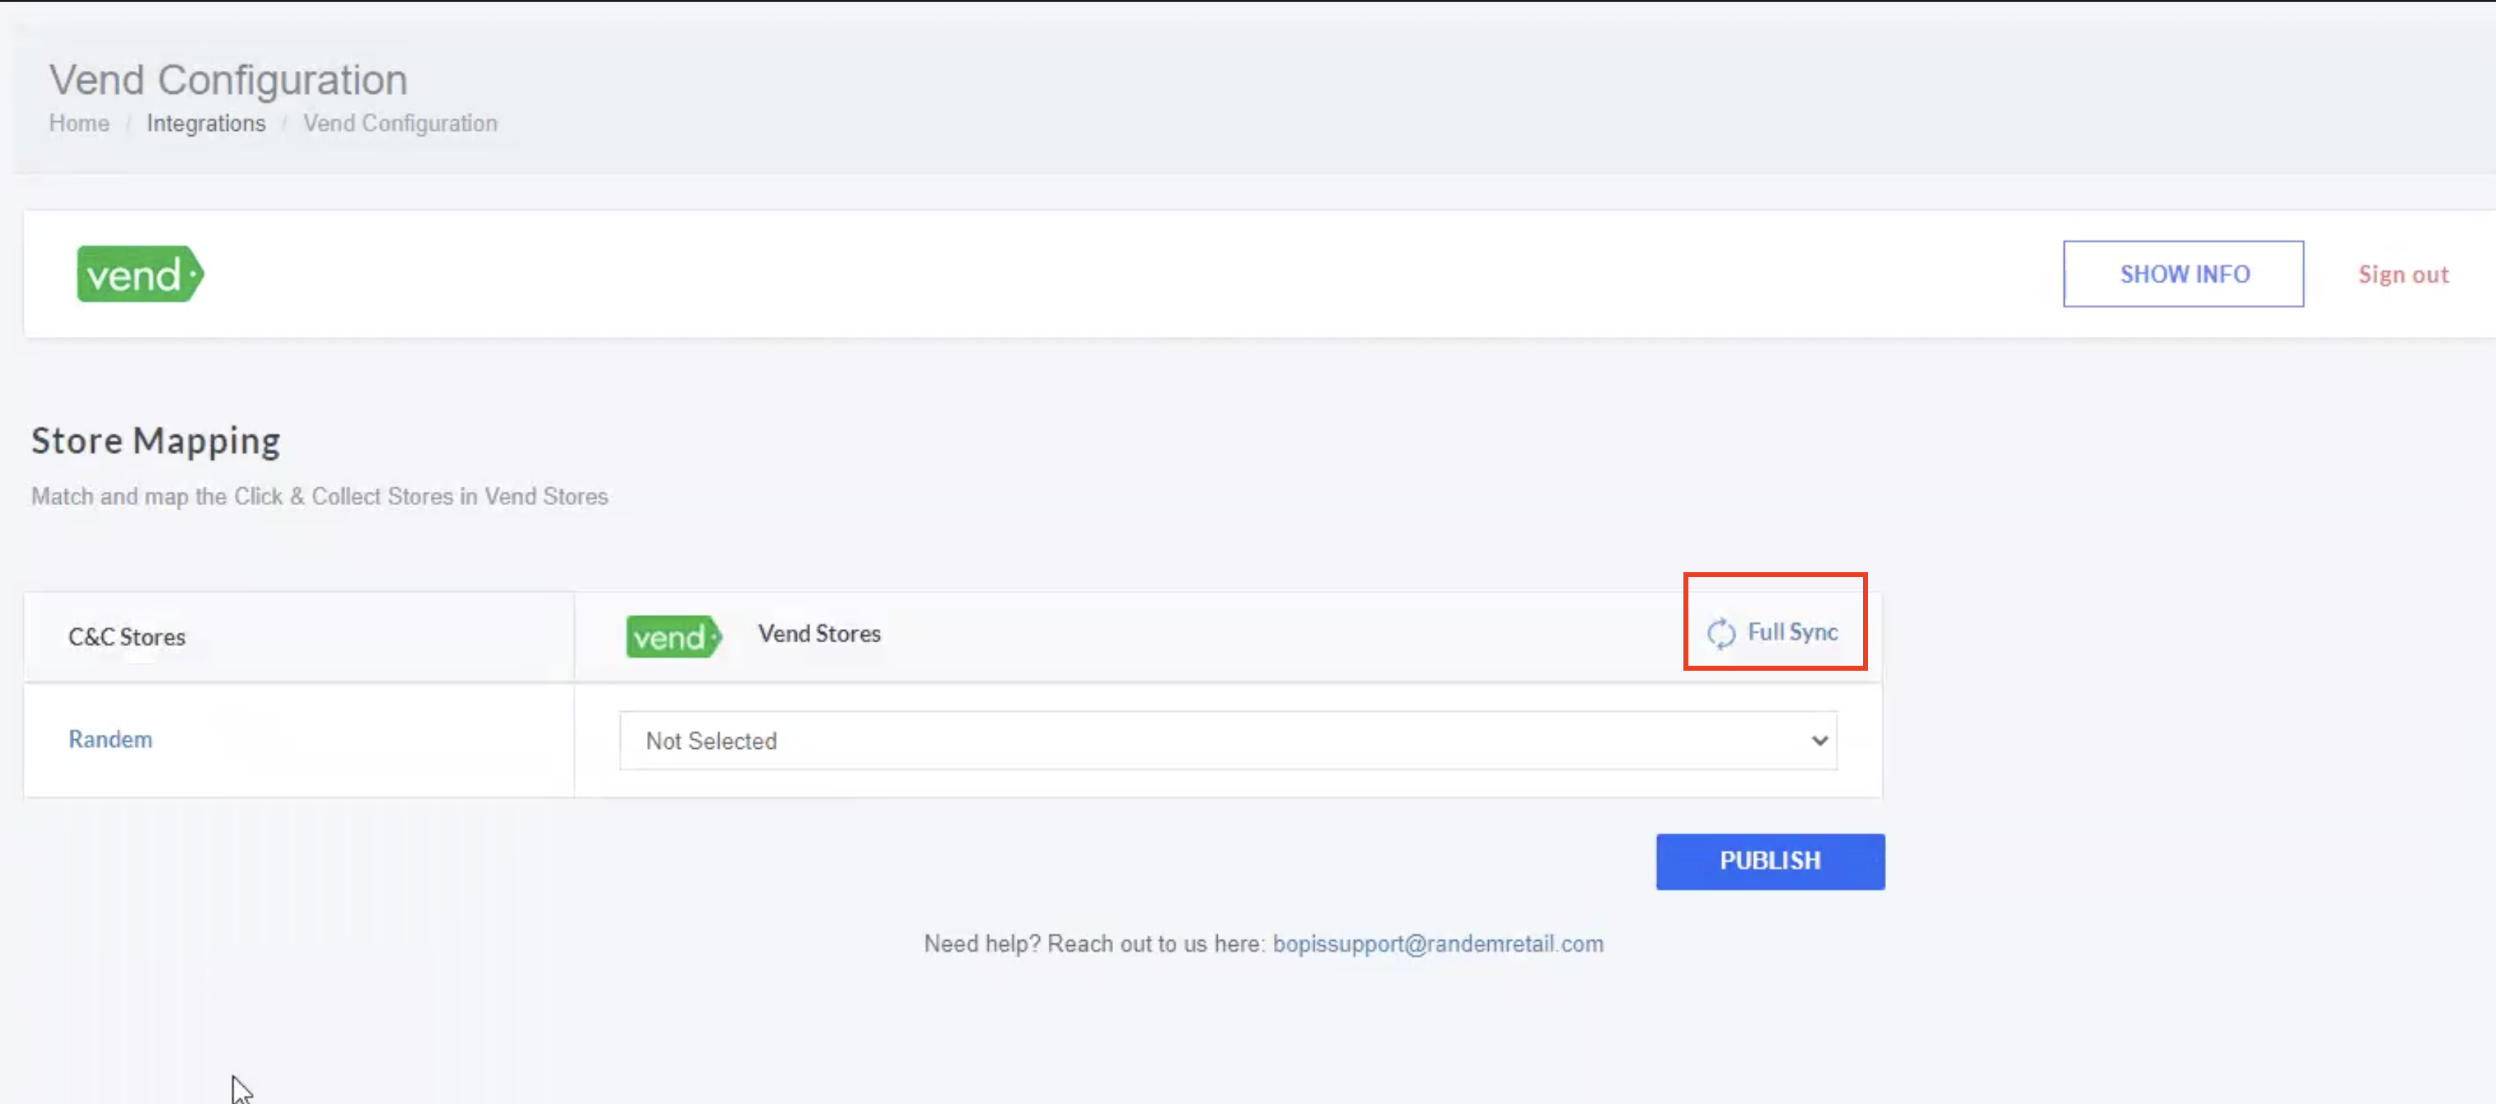
The integration still requires an initial sync to occur between Vend and BOPIS. This is to get the current stock level and ensure that when changes happen the application has all the correct amounts. Once you have finished doing all your store mappings you should click the Full Sync button.
This will begin a full sync where the BOPIS app will pull all inventory information from Vend to populate with the latest numbers.

How to setup future stores & force syncs
You can change or add stores at any point. Every time you add a new store within BOPIS it will appear in the Vend page, this will allow you to link the new BOPIS store to a Vend Location. You can also update a BOPIS store to change which Vend location it is mapped to.
Each time you add a new store or change the mapping it is required to force a resync again. This will update the new store with the inventory as well as change inventory on any updated stores.
Additionally, if you feel the inventory has become inaccurate in BOPIS vs what is in Vend you can force a resync to ensure everything is back up to date.


